
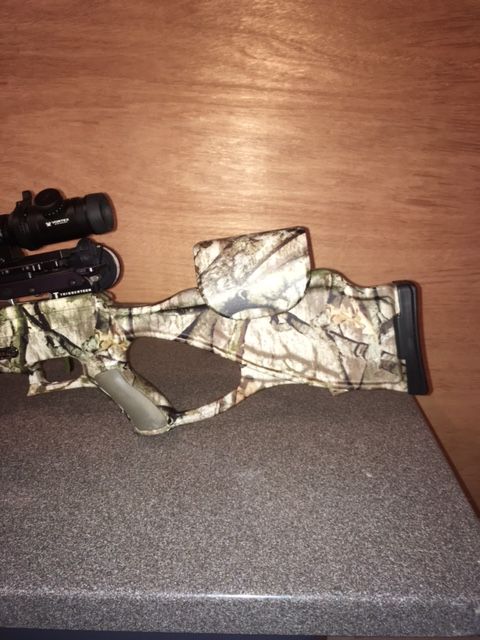
I was faced with the same problem, the factory cheek piece was way too low to accommodate the Optimizer set up.
I solved the issue on my BD400 using a VooDoo strap on comb raiser.
While it worked OK, it could be a little noisey against my clothing and I never liked the look.
I wanted more of a factory look, without all the straps, etc. and quiet.
I looked through all back posts here on the subject and started off.
Part of my challenge was that I'm currently at my "up north" cabin and there is a lack of "creative supplies" laying around so I had to make do with what I had on hand.
Here's what I came up with and it worked out pretty good so far.

 [/
[/ [/
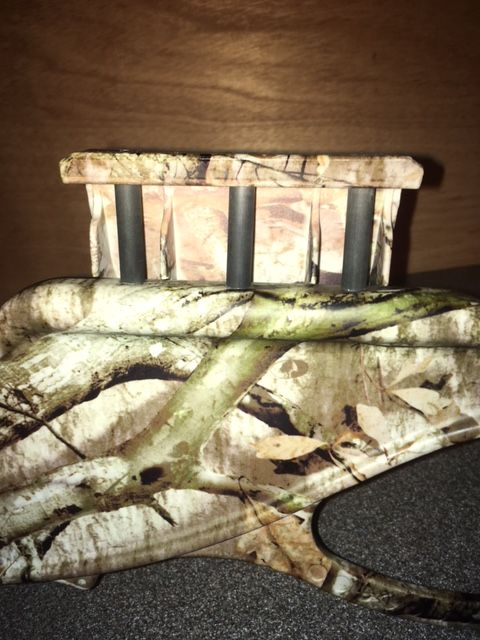
[/What I did is drill and tap 2 more holes, one on either side of the factory cheek piece screw hole. (10-24 thread, use a 5/32 drill bit)
I did drill my holes a little deeper than the factory, but not so deep that they would run out the bottom of the thicker top of the stock.
I rigged up my Dremel tool like an arrow cut-off tool.
I then cut 3 10-24 x 2 1/2" screws to about 2 1/4".
I then took 1 BE Zombie shaft and slid in a Carbon Express 400 shaft, creating a "double wall carbon fiber shaft". (I happened to have both laying around)
Then I cut the double wall shaft into 1 9/16" long pieces. (the height I determined I needed to add under the cheek piece to get to my desired height.
To finish it, I slid the screws into the top holes, slid the hollow carbon shaft pieces over the screws and then screwed the whole thing down to the stock. (I tightened the center one first).
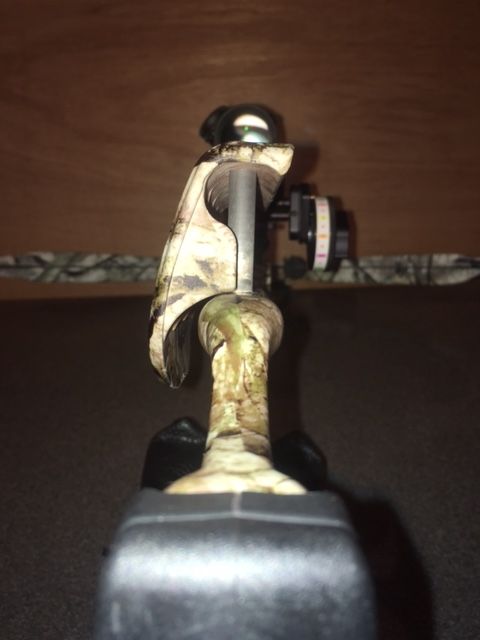
I WAS going to add a button head 2" 10-24 bolt through the side of the cheek piece and into the stock, putting 2 lock nuts on the bolt shaft under the cheek piece and then screwing them into place so the cheekpiece couldn't move in or out and then finishing it with an acorn nut on the offside of the stock, BUT so far using just the 3 top bolts, the cheek piece is very solid and sturdy.
If I wanted to remove, you just unscrew and remove the long bolts and carbon shaft pieces and put the cheek piece back in place.
The only way you could see any difference from factory at that point is that there would be 3 screws on the top of the piece instead of 1.
If you do this but want a lower cheek piece than mine, you might need to sand down the bottom "tabs" on the cheek piece so that they don't touch the stock.
I set it so those tabs are just barely off the stock so there'd be no noise or rubbing and the height was perfect for ME.
Total cost was less than $1.