I have been looking for a low cost entry / target / youth bow for awhile and had seen the Daisy youth crossbow model 4003. I picked one up new for around $50.
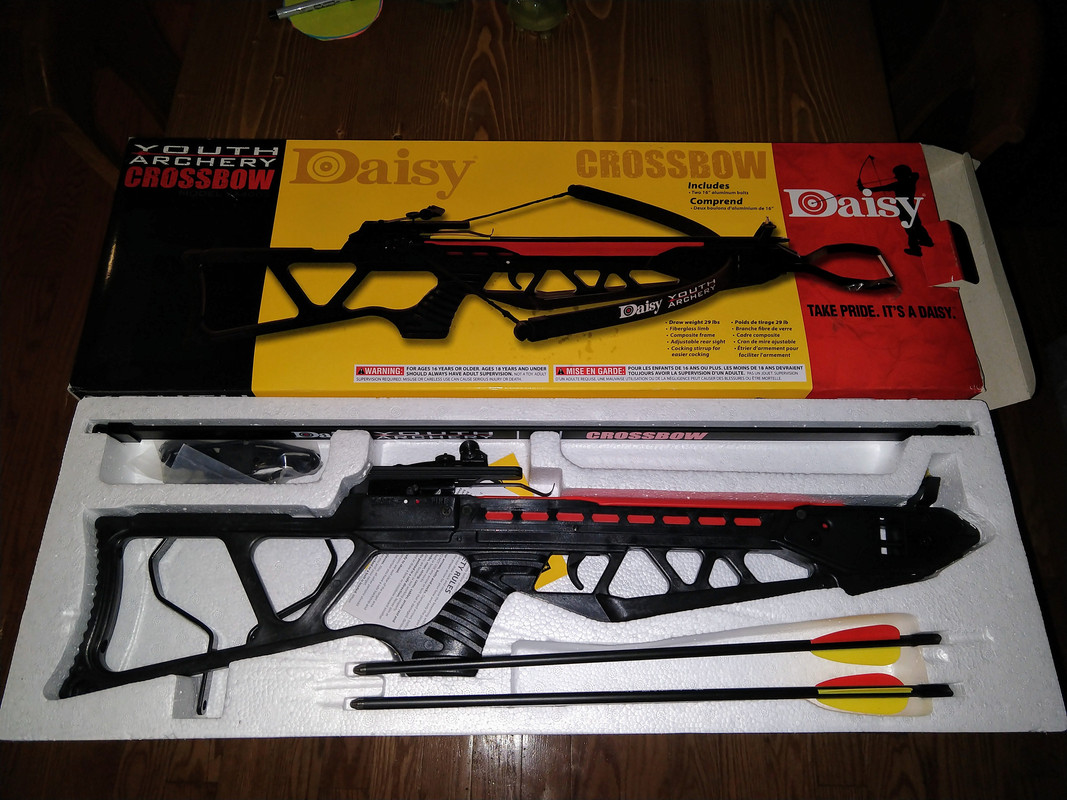
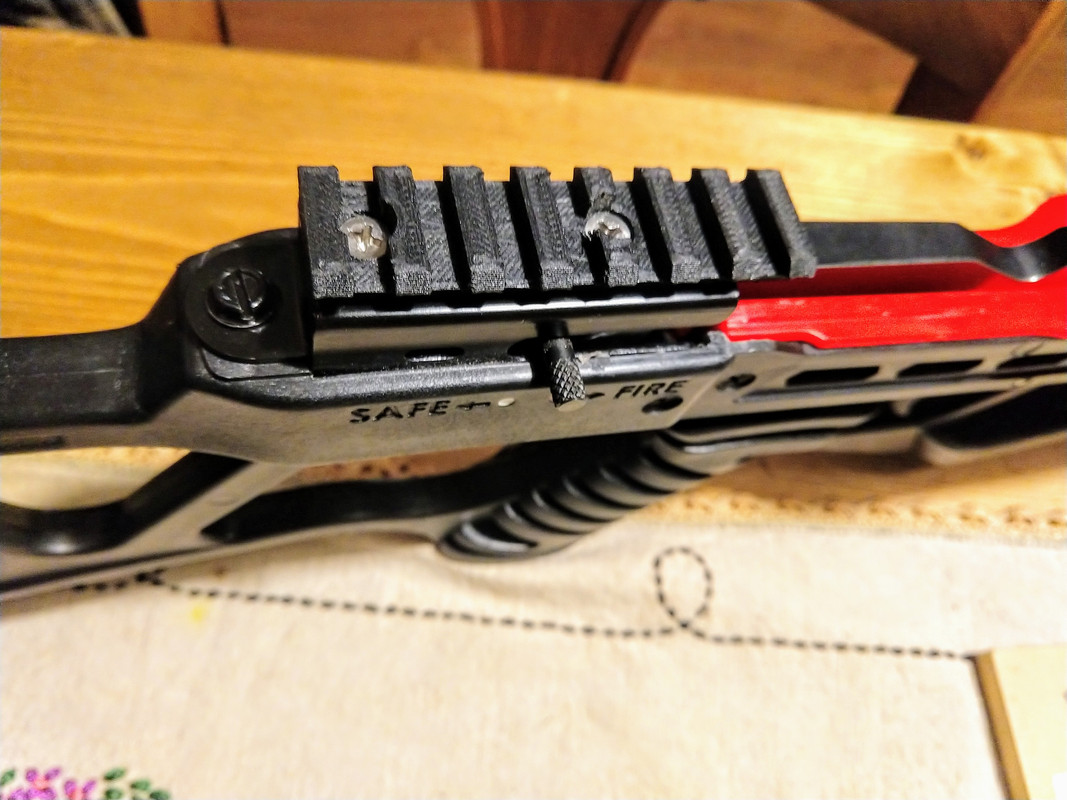
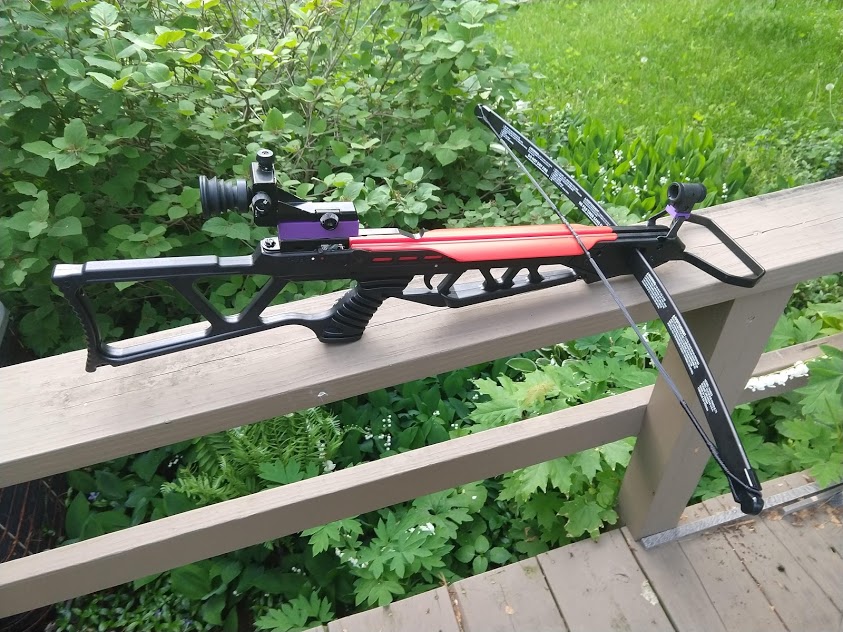
It has a 29# draw weight, a bullpup trigger setup, and comes with adjustable open sights. Trigger pull is fairly long although weight wise is not terribly heavy, around 4 pounds or so. The sights from the factory are pretty rough for target shooting as the front post covers a fair amount of the target. I removed the original sights and got to work in cad on making a picatinny rail to attach to the trigger housing. Here was the last version that I drew up, printed, and installed on the bow.
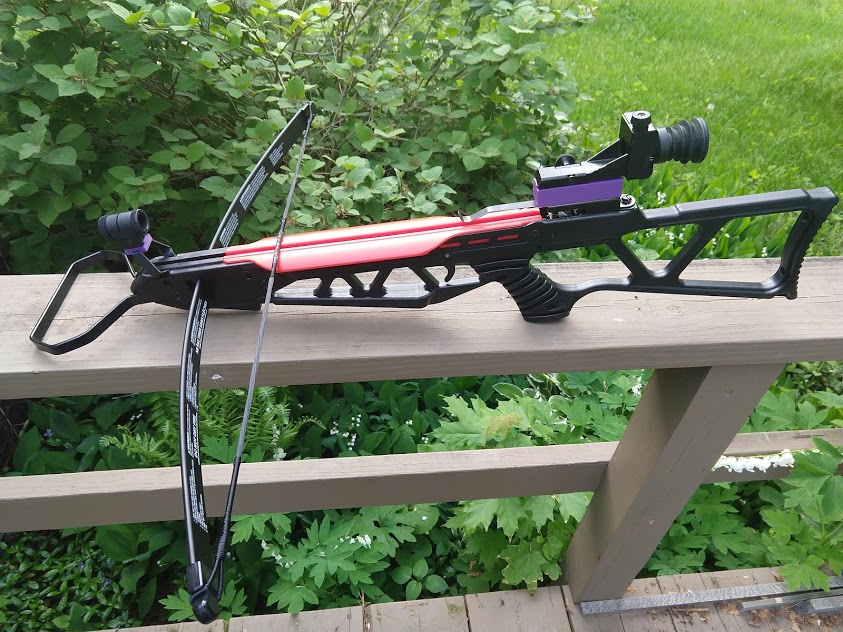
With the picatinny rail on the bow I was able to mount a spare red dot scope and get her sighted in at around 20 yards. I did have to mark the string on both sides with marker to draw it back consistently just like used to be recommended in the early Excalibur training videos. It was able to start shooting nice and consistent groups with the one arrow that I was using for sight in. The groups started to open a bit when I started trying the other arrows that came with the package. I picked up a few more arrows for it and was able to sort out 4 that would hit consistently. Will definitely want to start making arrows for it to get the most out of it for target practice.
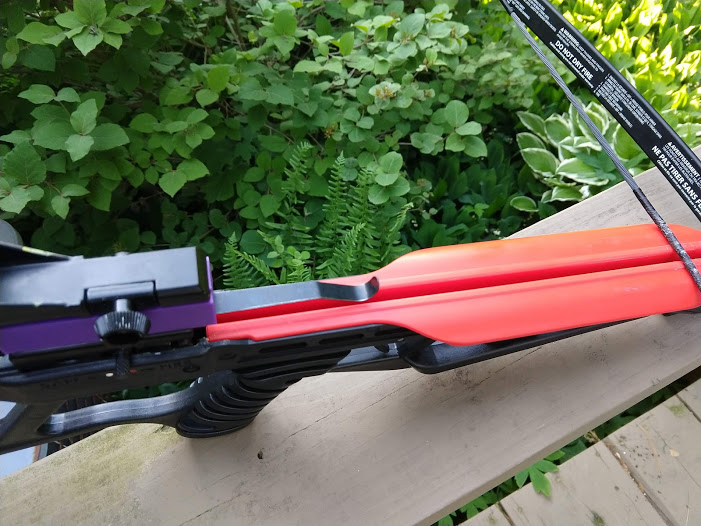
I also had a spare set of peep sights from a Daisy Avanti air rifle that I had picked up that I wanted to try out with the bow as well. So back to the computer to draw up an adapter for the front sight and for the rear sight. The adapters for the peep sights are the purple plastic pieces in the photos.
The bow shoots very consistent groups with the peep sight setup as well. Looks like there would be enough room in the trigger box to rework the safety to extend to the left side as well and not interfere with the string or the arrow. This thing is really fun to shoot with the super low draw weight, the hardest thing to do is to keep the string pulled back evenly. Other than the 3D printed parts the few screws that I needed to do the modifications were at my local hardware store. Definitely an option to consider if you want to introduce someone to the sport for an entry target bow.
Beginner / youth crossbow modifications
Moderator: Excalibur Marketing Dude
Beginner / youth crossbow modifications
2002 Exomag
Varizone with Burris Sig. Zee Rings
My mods:
Scope cover adapters
Optomechanical rangefinder
Custom built lit nocks
BCY Trophy flemish string
20" XX75 2219 arrows with 4" feathers
Varizone with Burris Sig. Zee Rings
My mods:
Scope cover adapters
Optomechanical rangefinder
Custom built lit nocks
BCY Trophy flemish string
20" XX75 2219 arrows with 4" feathers
Re: Beginner / youth crossbow modifications
Nice look’in good!
Now you got to add it to your signature
Last edited by ihunt on Tue Jun 04, 2019 4:36 pm, edited 1 time in total.
Micro Camo 335
Zombie Slayers
Zombie Slayers
Re: Beginner / youth crossbow modifications
Micheal, why not carve a rope cocker grove in the stock?
Some people just like stepping on rakes
Re: Beginner / youth crossbow modifications
What Boo said...you don't need the mechanical advantage offered by a rope cocker, that's for sure. However, it would eliminate the uneven draw on each limb.
By the way, what a varied skill set we have of people who post here. What a blend of space age technology with medieval technology.
"Gun Control Laws"--trying to nag criminals into submission.
Re: Beginner / youth crossbow modifications
Michael being an Engineer and having a doctorate puts me in medieval techology! I think that's appropriate!Hi5 wrote: ↑Tue Jun 04, 2019 3:14 pmWhat Boo said...you don't need the mechanical advantage offered by a rope cocker, that's for sure. However, it would eliminate the uneven draw on each limb.
By the way, what a varied skill set we have of people who post here. What a blend of space age technology with medieval technology.
All kidding aside, the talent shared on this forum is pretty great!
Some people just like stepping on rakes
-
- Posts: 3427
- Joined: Mon Nov 30, 2009 7:41 pm
- Location: Southern Michigan
Re: Beginner / youth crossbow modifications
Looks like a nice small game rig, Great mods to the bow good job.
Hunt eat sleep repeat.
Re: Beginner / youth crossbow modifications
Don,
I did try the rope cocker in two spots, one was with the back loop going around the butt stock as they had a series of grooves already there from the factory and I also tried looping it through the cutouts in the bow. The problem is with how they narrowed down the finger guard / rail. They could not have picked a worse spot as it is just the last few inches when pulling back the bow. The rope cocker has a tendency to jump inwards some of the time when using it this way, or if you pull one side a bit harder than the other it also gets the string off center. I had considered trimming it down the entire length on both sides, but that would defeat the purpose of it as a finger guard, which is not ideal for an entry bow.
Thanks for the kind words, and we all seem to share what we can as we are able.
2002 Exomag
Varizone with Burris Sig. Zee Rings
My mods:
Scope cover adapters
Optomechanical rangefinder
Custom built lit nocks
BCY Trophy flemish string
20" XX75 2219 arrows with 4" feathers
Varizone with Burris Sig. Zee Rings
My mods:
Scope cover adapters
Optomechanical rangefinder
Custom built lit nocks
BCY Trophy flemish string
20" XX75 2219 arrows with 4" feathers
Re: Beginner / youth crossbow modifications
Hmmmm
What's the odds of that red plastic arrow channel being removed without damage? You manufactured some picatinny rail, how about a new arrow channel? An arrow channel with finger guard running straight and far enough back to enable rope cocking? Or would that interfere with other functions?
If the limbs are loading unevenly even when a rope cocker is being used, maybe you need to adapt the rope cocker and dedicate it to that bow. Set the rope length for that specific bow. Then take off one handle and run BOTH ends of the rope into ONE handle. That should compel both limbs to load evenly, as long as the pull back is straight, and at right angle to the string. Of course, maybe both limbs aren't equal.
Oh boy, and what the heck am I doing, presuming to tell this stuff to an engineer? Just thinking out loud, I guess, and would like your project to be successful.
"Gun Control Laws"--trying to nag criminals into submission.
Re: Beginner / youth crossbow modifications
Hi5,
The red piece that forms the deck is fairly easy to remove, I had thought about flipping it around as there are only 4 screws that hold it in place. That would make it a little less of a jump. I had also thought about making a replacement piece out of kydex plastic, although I was trying to minimize the number of pieces that I would have to create that I would not be able to print. The limb on the bow is a single piece that you install from the box, mostly by eyeball and then with a square along the . One other option that I was thinking about was to build a cocking sled to keep it pulled back evenly. Thanks for the additional thoughts on how to draw the bow back evenly. Still a few more options to explore, and parts to draw up and print.
2002 Exomag
Varizone with Burris Sig. Zee Rings
My mods:
Scope cover adapters
Optomechanical rangefinder
Custom built lit nocks
BCY Trophy flemish string
20" XX75 2219 arrows with 4" feathers
Varizone with Burris Sig. Zee Rings
My mods:
Scope cover adapters
Optomechanical rangefinder
Custom built lit nocks
BCY Trophy flemish string
20" XX75 2219 arrows with 4" feathers